After deploying HCL SafeLinx, one of the first things you should do, is to configure the communication between the HCL SafeLinx Administrator client and the HCL SafeLinx Access Manager, so that it takes place in an encrypted and secure manner.
For this, only a few simple steps are needed.
- Generate a new p12 keystore together with a new private key and SSL certificate, which we will use for accessing the HCL SafeLinx Access Manager.
- For this, we need OpenSSL or similar software.
- Example using OpenSSL:
openssl req -newkey rsa:4096 -nodes -sha256 -keyout sf.key -x509 -days 3650 -subj “/C=DE/ST=Florida/O=NOW/CN=<insert_your_sf_fqdn_here>” -out sf.crt
This will create a new private key “sf.key” and a certificate “sf.crt”. The Subject name of the certificate, in this case, is not important, use it for your reference.
With the next command, we will create a new p12 keystore using the private key and the certificate we created earlier.
openssl pkcs12 -export -out sfNew.p12 -inkey sf.key -in sf.crt
- Copy the p12 keystore to the HCL SafeLinx server.
- You can place it into the installation folder of HCL SafeLinx server or outside of it.
- Configure the HCL SafeLinx Access Manager to use the new p12 keystore.
- To do this, we will use the HCL SafeLinx Administrator.
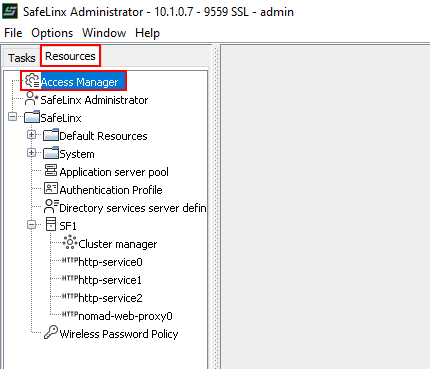
- Connect to the HCL SafeLinx Server, switch to the “Resources” tab and open “Access Manager” properties:
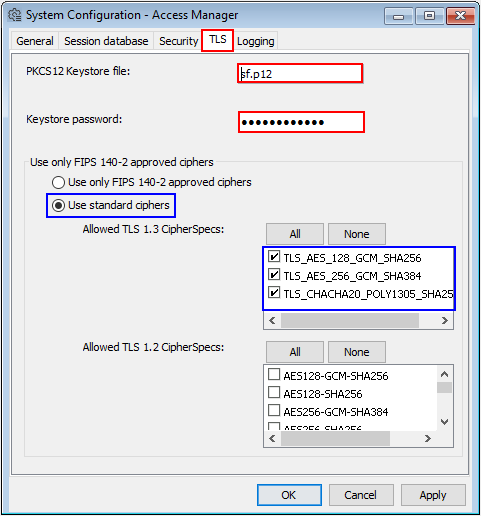
- Change the p12 keystore.
- Switch to the “TLS” tab and enter the path to the newly created p12 keystore, as well as the password you have set for the database.
Note: If you have copied the p12 keystore into the installation folder of the HCL SafeLinx server, then you can use the relative path to the file, as in the screenshot above.
- Create a new “secure” connection profile in the HCL SafeLinx Administrator client.
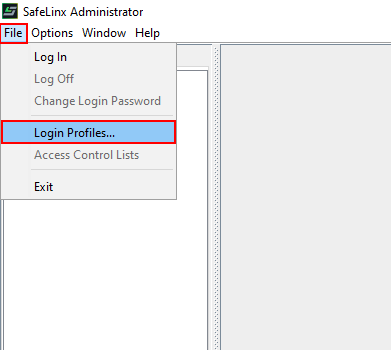
- Open the “Login Profile Details” menu:
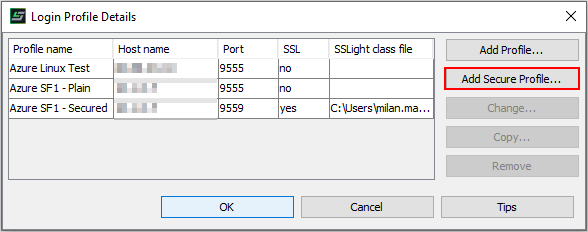
- In the next menu, select “Add Secure Profile…”:
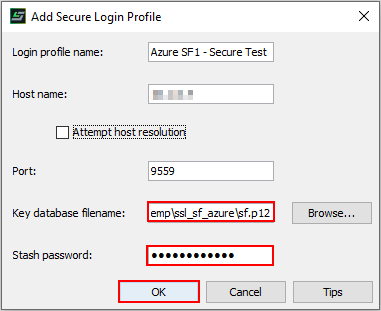
- Now we must enter the path to the p12 keystore on the client, as well as the password for opening the database:
As of now, you should be able to use HCL SafeLinx Administrator to connect to the HCL SafeLinx server over an encrypted connection.

